Showing posts with label Tutorial. Show all posts

Friday, March 11, 2011

Butterfly Fairy Wand Tutorial

Things are starting to settle down around here. My house and craft room are finally back in order, the kids are back on their schedules and I feel a bit more rested. Hopefully next week I'll get back to crafting some vintage inspired goodies and am still planning on putting together a tutorial featuring some of Claudine Hellmuth's mixed media art techniques--so looking forward to trying those out for myself.

In the meantime though, I put together a little tutorial on how to make your own Butterfly Fairy Wand for those special Fairy Princess's in your life.
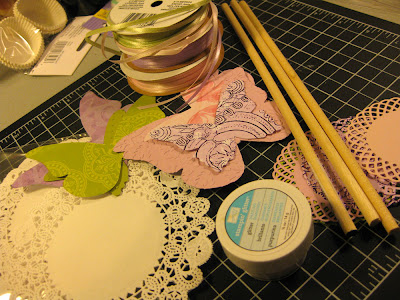
To make your own wand you will need to gather a few supplies; Paper dolie, ribbon, die cuts, card stock, a 10" wood dowel, score tape or other strong adhesive, paper cutter and a circle punch.

I started off by spraying a paper doilie with adhesive and then applying a fine glitter, because what good would a fairy wand be without a little sparkle?
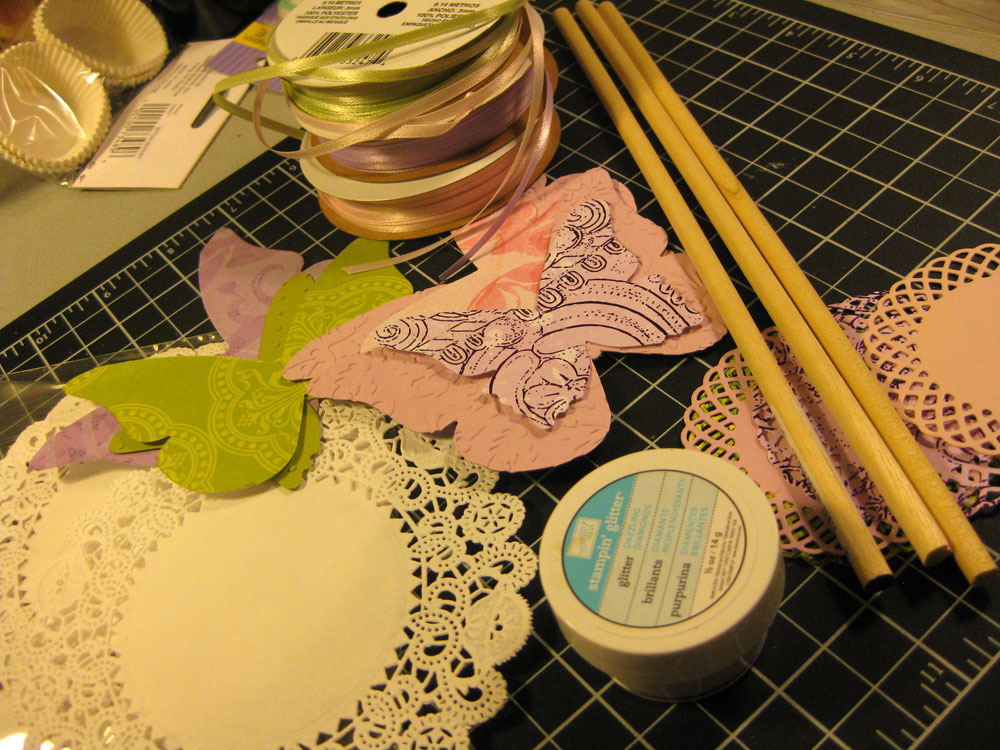
My secret weapon for this project was score tape--love, love, love it! It's a super sticky tape and once something is adhered with it--it's not going anywhere!


To decorate the wooden dowel start off by cutting a piece of score tape (or other strong adhesive) just long enough to wrap around your the top of your dowel. Lay the tape down, sticky side up, and adhere three strands of thin ribbon on top.

Wrap the score tape around the top of your dowel, making sure that each piece of ribbon lays flat and facing down--that way there are no pieces of ribbon sticking out in awkward directions. Repeat this step to add ribbon to the bottom of the dowel as well.

Add a strip of score tape to both edges of a 9 1/2 inch by 1 1/4 inch cut piece of card stock.


Carefully roll the strip around the dowel, making sure to cover the bottom edge of the dowel, including the top of the ribbons with the card stock. Make sure to leave the top 1/2 inch of the dowel exposed, as it will be covered later anyway.


Layer your embellishments with score tape to the top of your sparkling doilie.


Cut a 2 1/2" circle from coordinating card stock and cover the circle with score tape.


Place the exposed top of the dowel on the circle  so that it sticks. Now position the dolie on top.

It's pretty simple and it's easy to make a bunch of these at the same time, especially if you have everything cut before you start to assemble.

Have fun bringing a little Fairy magic to someone specials life! I know I did.

Early next week I will be doing my very first GIVE AWAY! So make sure to stop by for your chance to win!


Thursday, January 27, 2011

Photoshop Quick Cuts Tutorial: Selecting with the Magic Wand Tool

The silhouette is a timeless and classic staple of good design. And more and more the silhouette, paired up with a trendy color, has been showing up in many of the latest scrapbook collections and as a popular design motif on the indie scene. Last week I shared a card I made using a little easy photoshop magic to create my very own re-vamped version of the classic silhouette. I thought I would share a quick tutorial  for the photoshop novice to make their very own re-vamped silhouette.


Start off with a black and white silhouette and open up the image file in the photoshop program. Using the magic wand tool highlight the black area of the image.


Using the Select drop down menu tab, choose inverse to select all of the white positive space on the image.


Select the color you would like to use for your background, and then choose the Fill option from the Edit drop down tab. When the fill box pops up, make sure to select foreground color and 100 % opacity.

Now deselect the image by clicking on it once. Again, using the magic wand tool select the black portion of the image. I set the tolerance for the Magic Wand at 50, which should insure that all of the black pixels will be selected.

Select the default colors black and white in the color selection boxes and make sure to select white as your foreground color.

Use the Fill option again on the Edit drop down menu to change the black portion of the image to white.


Go on and give it a try. Flickr is a great source for images, in fact I probably found my silhouette image from one of the photostreams on that site. You can also reverse the colors for another interesting look, giving the image a white background and a fun and funky colorful silhouette. Have fun and let me know how it goes!

Thursday, January 13, 2011

Vintage Snowflake Garland Tutorial

Happy New Year and welcome to the very first post of my new blog Vintage Haven Studio. I'm so excited to be here writing about the things that I am passionate about. Blogging is not something new for me, but over the past year I had very little time for it and sadly my former blog, Indigo Wings was neglected as my family and I adjusted to life with our newest baby.

Now that baby is nearly a year and my little guy is busy with pre-school I feel that I have that bit of space I needed to spread my creative wings again, and I am ready to share my creative journey with others of the same interest. To signify that return I felt a new blog was in order with a new focus. I'll still be blogging about paper crafting and making handmade cards, but I also hope to write about my love of all things vintage and my passion for repurposing anything old into something completely new.


To celebrate my first blog post I wanted to share a tutorial with you on how to make your own one of a kind snowflake garland. I was inspired to make this garland one day when I was crafting with my son. I love to sit down with him and take out the craft supplies and get all messy crafty. He's becoming quite the little artist himself. One day I realized I had never taught him to cut up paper to make it look like a snowflake; I loved making them myself as a kid. So we made snowflake after snowflake and one thing lead to another and I added this and added that and ended up with a cute banner to brighten up my kitchen throughout these bleak winter months.
The great thing about cutting out snowflakes yourself by hand, just like the real thing, is that not one of them is the same as the other.

To make your snowflake garland you will first need a sharp pair of scissors, a bone folder and two square pieces of paper of a thin quality preferably computer paper. Unfortunately, cardstock would be very difficult to cut for this project.

1. Fold the square piece of paper corner to corner to create a triangle half the size as your original square. Make sure to score the creases with your bone folder.


2. Then fold this triangle along its height to create a new triangle 4 layers thick.

3. Take one of your lower corners and fold it 60 degrees across the base of the triangle. Now fold the remaining corner of the triangle to line up with the other edge and snip off the two tails at the end of the triangle.

Now you’re ready to cut like crazy!


I started with a 7 inch square paper to make a larger snowflake and then a 5 inch square paper for a smaller snowflake which I then layered. I added lots of distress ink to my snowflakes to give them their aged look.


I finished it off with a paper rosette and a die cut vintage beauty that I highlighted with a ring of glass glitter to add to her vintage charm. I then attached my three snowflakes to a piece of satin ribbon.

Here's a tip if you are not happy using plane computer paper for your flakes. Find a piece of patterned paper that you love and scan it into your computer. Then go ahead and print it out on computer paper to add a pattern to you lighter weight paper that can then be easily cut into a snowflake.

Have fun creating and make sure to stay warm!

Tina


Related Posts Plugin for WordPress, Blogger...