Happy New Year and welcome to the very first post of my new blog Vintage Haven Studio. I'm so excited to be here writing about the things that I am passionate about. Blogging is not something new for me, but over the past year I had very little time for it and sadly my former blog, Indigo Wings was neglected as my family and I adjusted to life with our newest baby.
Now that baby is nearly a year and my little guy is busy with pre-school I feel that I have that bit of space I needed to spread my creative wings again, and I am ready to share my creative journey with others of the same interest. To signify that return I felt a new blog was in order with a new focus. I'll still be blogging about paper crafting and making handmade cards, but I also hope to write about my love of all things vintage and my passion for repurposing anything old into something completely new.
To celebrate my first blog post I wanted to share a tutorial with you on how to make your own one of a kind snowflake garland. I was inspired to make this garland one day when I was crafting with my son. I love to sit down with him and take out the craft supplies and get all messy crafty. He's becoming quite the little artist himself. One day I realized I had never taught him to cut up paper to make it look like a snowflake; I loved making them myself as a kid. So we made snowflake after snowflake and one thing lead to another and I added this and added that and ended up with a cute banner to brighten up my kitchen throughout these bleak winter months.
The great thing about cutting out snowflakes yourself by hand, just like the real thing, is that not one of them is the same as the other.
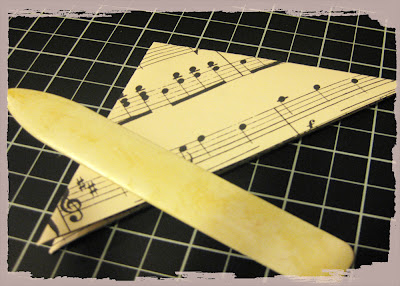
To make your snowflake garland you will first need a sharp pair of scissors, a bone folder and two square pieces of paper of a thin quality preferably computer paper. Unfortunately, cardstock would be very difficult to cut for this project.
1. Fold the square piece of paper corner to corner to create a triangle half the size as your original square. Make sure to score the creases with your bone folder.
2. Then fold this triangle along its height to create a new triangle 4 layers thick.
3. Take one of your lower corners and fold it 60 degrees across the base of the triangle. Now fold the remaining corner of the triangle to line up with the other edge and snip off the two tails at the end of the triangle.
Now you’re ready to cut like crazy!
I started with a 7 inch square paper to make a larger snowflake and then a 5 inch square paper for a smaller snowflake which I then layered. I added lots of distress ink to my snowflakes to give them their aged look.
I finished it off with a paper rosette and a die cut vintage beauty that I highlighted with a ring of glass glitter to add to her vintage charm. I then attached my three snowflakes to a piece of satin ribbon.
Here's a tip if you are not happy using plane computer paper for your flakes. Find a piece of patterned paper that you love and scan it into your computer. Then go ahead and print it out on computer paper to add a pattern to you lighter weight paper that can then be easily cut into a snowflake.
Have fun creating and make sure to stay warm!
Tina


i love your vintage snowflakes! such a great idea.
ReplyDeleteenjoy your weekend!!
tracy