Things are starting to settle down around here. My house and craft room are finally back in order, the kids are back on their schedules and I feel a bit more rested. Hopefully next week I'll get back to crafting some vintage inspired goodies and am still planning on putting together a tutorial featuring some of Claudine Hellmuth's mixed media art techniques--so looking forward to trying those out for myself.
In the meantime though, I put together a little tutorial on how to make your own Butterfly Fairy Wand for those special Fairy Princess's in your life.
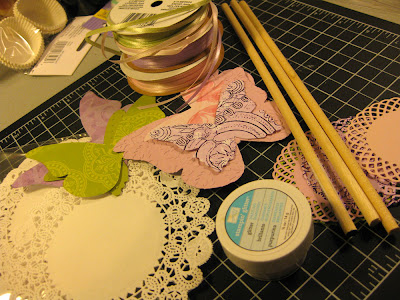
To make your own wand you will need to gather a few supplies; Paper dolie, ribbon, die cuts, card stock, a 10" wood dowel, score tape or other strong adhesive, paper cutter and a circle punch.
I started off by spraying a paper doilie with adhesive and then applying a fine glitter, because what good would a fairy wand be without a little sparkle?To make your own wand you will need to gather a few supplies; Paper dolie, ribbon, die cuts, card stock, a 10" wood dowel, score tape or other strong adhesive, paper cutter and a circle punch.
My secret weapon for this project was score tape--love, love, love it! It's a super sticky tape and once something is adhered with it--it's not going anywhere!
Wrap the score tape around the top of your dowel, making sure that each piece of ribbon lays flat and facing down--that way there are no pieces of ribbon sticking out in awkward directions. Repeat this step to add ribbon to the bottom of the dowel as well.
Add a strip of score tape to both edges of a 9 1/2 inch by 1 1/4 inch cut piece of card stock.
Add a strip of score tape to both edges of a 9 1/2 inch by 1 1/4 inch cut piece of card stock.
Carefully roll the strip around the dowel, making sure to cover the bottom edge of the dowel, including the top of the ribbons with the card stock. Make sure to leave the top 1/2 inch of the dowel exposed, as it will be covered later anyway.
Cut a 2 1/2" circle from coordinating card stock and cover the circle with score tape.
It's pretty simple and it's easy to make a bunch of these at the same time, especially if you have everything cut before you start to assemble.
Have fun bringing a little Fairy magic to someone specials life! I know I did.
Early next week I will be doing my very first GIVE AWAY! So make sure to stop by for your chance to win!


I like what you do, it's very beautifull!!! I know you for PINK LITTLE CAKE. Sorry for my english....
ReplyDeleteHave a nice day!!!
Que cosas mas bonitas haces. Felicitaciones y gracias por el tutorial.
ReplyDeleteUn besito
http://corazonyazucar.blogspot.com/
WOW! This is a great tutorial! Thanks for sharing! xo
ReplyDelete-pamela :)